
Help & Support Centre
Help With Website Templates
Accessing your templates
The first step in accessing your website is to set up a Squarespace account. Use this link to access 20% discount on any annual plan. Please make sure you sign up to Squarespace with the same email you use to purchase the website template.
After purchasing your chosen template, we’ll be sending you a link within 48 hours of the time of purchase.
To access your design, follow these steps:
Check your emails - the subject line will be “Contributor Invitation from Anna Bolt”.
Accept Invitation
Set up a Squarespace account
Start editing your website immediately
If you need more tips with Squarespace, you can view hundreds of tutorials here.
Accessing your templates
As part of your purchase, you get a 6 months trial with your plan so you can try Squarespace and get to know its features before subscribing to a paid plan. Squarespace doesn't require credit card information to sign up for a trial. To publish your website and add your domain, you must purchase a paid plan.
Choosing the right plan ensures you have the features you need for your site. The Personal and Business plans are ideal for websites, while the Commerce plans have more features for online stores. You can subscribe to these plans on an annual or monthly billing cycle.
You can also purchase domains through Squarespace, reserving your site with a domain parking page. All annual Squarespace plans include a free custom domain for the first year.
Pricing and billing
For Squarespace’s current pricing on any of these plans, visit their Pricing page.
Domain pricing varies by TLD.
All website plans are available in annual or monthly billing cycles. On an annual billing cycle, the average monthly cost is lower, and you can register a free custom domain for a year.
Domain subscriptions renew annually.
Buying a domain
Squarespace offers you the option of either buy your domain on Squarespace or use another domain you purchased elsewhere from another provider, such as GoDaddy.
This short tutorial video shows how to purchase a domain from Squarespace.
The process is very simple - just click on Get a Domain and follow the steps on the screen. This is the easiest way to purchase your own domain.
For more info on setting up a domain you bought elsewhere, click here.
For more information on managing domains on Squarespace, click here.
Personalising your website
Use the options in the Site styles and Design panels to make style changes to your site. You can edit global styles to make changes that apply to your whole site for a consistent look, or you can style individual sections.
This guide reviews how to use style options, called "tweaks," to change the look of your site. We recommend experimenting with the different design options as you build your site. By testing different fonts, colors, and page settings, you'll get a grasp of what's possible and create a design you'll love.
For more info on style changes for your website, read the information provided on the Squarespace help centre.
Making design changes
To open the Site styles panel, click the paintbrush icon in the top-right corner while editing any page.
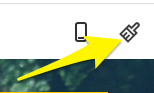
From there, click the site element you'd like to change, like Fonts or Colors. Use this guide for more detailed steps on each panel. You can also open site styles in the Home menu by clicking Design, then Site styles.
To close site styles, double-click the page preview, click the paintbrush icon, or click Close at the top of the panel. Your style changes will remain intact until you save or undo them.
With site styles closed, you can make more fine-tuned changes by editing a specific section. To style a section, hover over the section, then click the pencil icon. Section styles override site-wide styles.
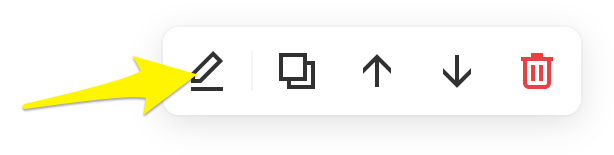
Here, you can also choose different layouts for collection and gallery sections. If you make style changes to a collection section, it affects all layouts of that type. For example, if you have two blog sections that both use a masonry layout, any style changes you make to one section affect both sections.
Changing your font and colours
Colours
How you change your site's colors depends on your site's version.
To change your site's colors, open site styles, then click Colours.
With curated color palettes, you can make changes to all your site's colors at once, or customize the colors for individual site elements. To learn more about changing site and section colors, visit Changing colours.
Fonts
How you change fonts depends on your site's version.
To change a font, open site styles, then click Fonts.
In the Fonts panel, you can choose a font pack to apply to all text on your site, or change the font of specific types of text. To learn more, visit Changing fonts.
In any text area, you can also change the text format to a heading, paragraph text, or monospace text, or add a link.
Links are always underlined.
When visitors click a link, a dotted line appears around it, which helps make your site more accessible to all visitors.
Changing your footer and header
Header
Visitors use the header at the top to navigate your site. How you edit the header depends on your site's version.
To edit your site's header, click Edit in the top-left corner of your site preview, then hover over the header and click Edit site header. Use the options in the editor to customize your site title or logo and navigation links. You can also add a shopping cart icon, social icons, and a call-to-action button.
For more detailed steps, visit Building a site header.
Footer
How you style your footer depends on your site's version.
To style the footer:
In the top-left corner, click Edit.
Hover over the footer and click Edit footer.
Click the pencil icon to make style changes.
To learn more, visit Editing footers.
Adding images
There are many ways to add images to your site. Ensure you follow our formatting guidelines to help your images look great on any device. You can:
Add an image to a page or post using the image block.
Add a site logo, social sharing logo, and favicon to make your branding cohesive and strong.
Add multiple images to a page with a gallery section.
Use gallery blocks to display multiple images on other areas of your site.
Upload product images to show an item's different styles and angles, then display them on different parts of your site with product blocks.
Add a banner image to the top of a page to set its tone.
Use an Instagram Block to display the latest images from an Instagram Feed.
Use featured images to represent collection items, like blog posts and events. Use a summary block to display those featured images in other areas of your site.
Resizing images
After you add images, you might want to make the images bigger or smaller on the page. For example, an image could be too large, overwhelming the rest of the page’s content. Or your logo might be too small, making it difficult to read. How you resize an image depends on how you added it to your site.
Blocks
To reduce the width of any block, add other blocks next to it. For example, if you add a spacer block next to an image block, it reduces the size and width of the image block by half. You can then change the width of the spacer block to make the image block larger or smaller.
Many blocks have other options to further customize the image size and shape:
Image blocks - Use the cropping handle to change the height of inline and poster blocks image blocks.
Gallery Blocks - Depending on the layout, you can crop or resize images.
Summary blocks - Use design settings to change how your images appear.
Instagram blocks - Use settings to choose a design and change the aspect ratio.
Pages and sections
Gallery sections - Style the gallery so the images appear how you’d like. You might also want to try using a different layout.
Portfolio pages - Style the portfolio section to change how images appear.
Store pages - Style your store pages to change the aspect ratio and product image width.
If your site is on version 7.0, you can also add images to gallery pages and cover pages. Some version 7.0 templates support site-wide background images. For help resizing images, review your template's guide.
More Help

Canva Template Help

Download Troubleshoot
License & Copyright Info
General FAQs
-
A common issue you may experience when checking out is the payment failing.
This can sometimes happen when your bank declines the transaction for some reason. This usually occurs when checking out using Stripe.
If you have attempted to checkout using Stripe and the payment does not go through, we recommend trying to checkout with PayPal.
-
When you purchase a product you should immediately be sent a confirmation of your order email. This email contains information about your order and a link to download the product. (This is usually a PDF that includes links to Canva and Squarespace)
Please check your spam/junk folders to see if the email has ended up in there.
If you have not received it, please email us on hello@amadobranding.com
-
When a product is updated, all links to the product will take you to the updated version.
Open the original pdf you received with your purchase and click the product link in your original email purchase invoice.
-
Unfortunately not, however if you are really unhappy with the template or course you bought, please email us on hello@amadobranding.com